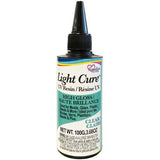
Light Cure UV resin will help to complete your DIY jewelry-making projects. You can use it on plastic, glass, bezel, Acrylic and more for a clear, high gloss finish. The possibilities are endless.
HELPFUL HINTS:
Tip 1: Make sure any mold you use is completely clean! Whatever is in the mold will be in the piece you cast!
Tip 2: We formulated this product to have air come out of it automatically, but air bubbles can occur occasionally. When you fill the mold, hold the bottle tip to the edge of the mold and let the resin flow and rise. Then lift the bottle out and there should not be any air bubbles. If bubbles exist and don't pop on their own, a quick puff of air from your mouth should burst them. If they are more stubborn, then a lit match passed close to the surface swill do the trick.
Tip 3: Curing the resin. There are typically two types of molds; flat base where the sides are a uniform height and there are molds with non uniform depth. The UV light needs to pass through the resin to cure. The shallower areas will cure first. Place the resin under your light source for 60 seconds. After the first 60, rotate the mold so another area sees the light. After that 60, if the surface of the mold feels tack free, flip the mold over and hit it again for 60 seconds. Let the cast cool down and de-mold. If the piece is still tacky pop it under the light for another 30 or 60 seconds.


